Asset Importing
-
Importing Assets Tutorial
Accessing the Import Screen
You can access the asset import screen via the selection menus for animations or models (both in the Weapon Type & the Mob Capability editor screens).
See the images below in weapon types editor:
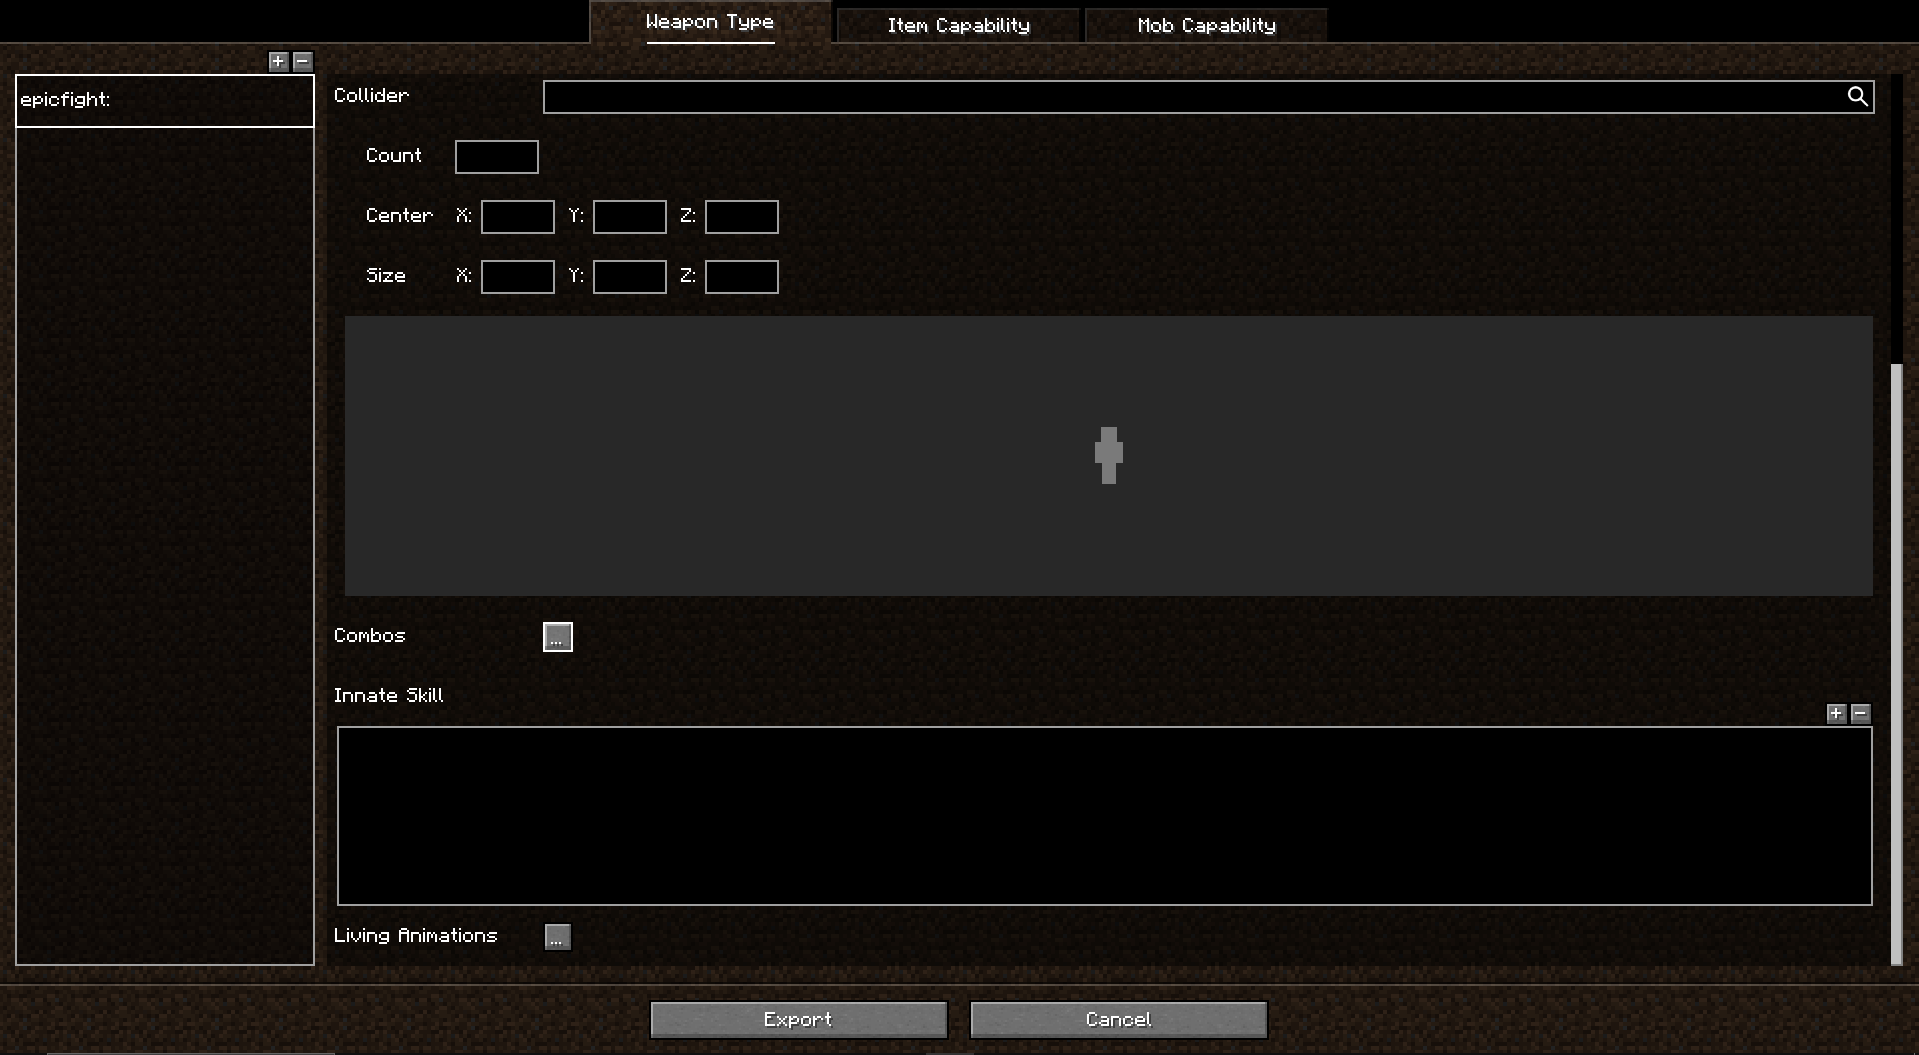
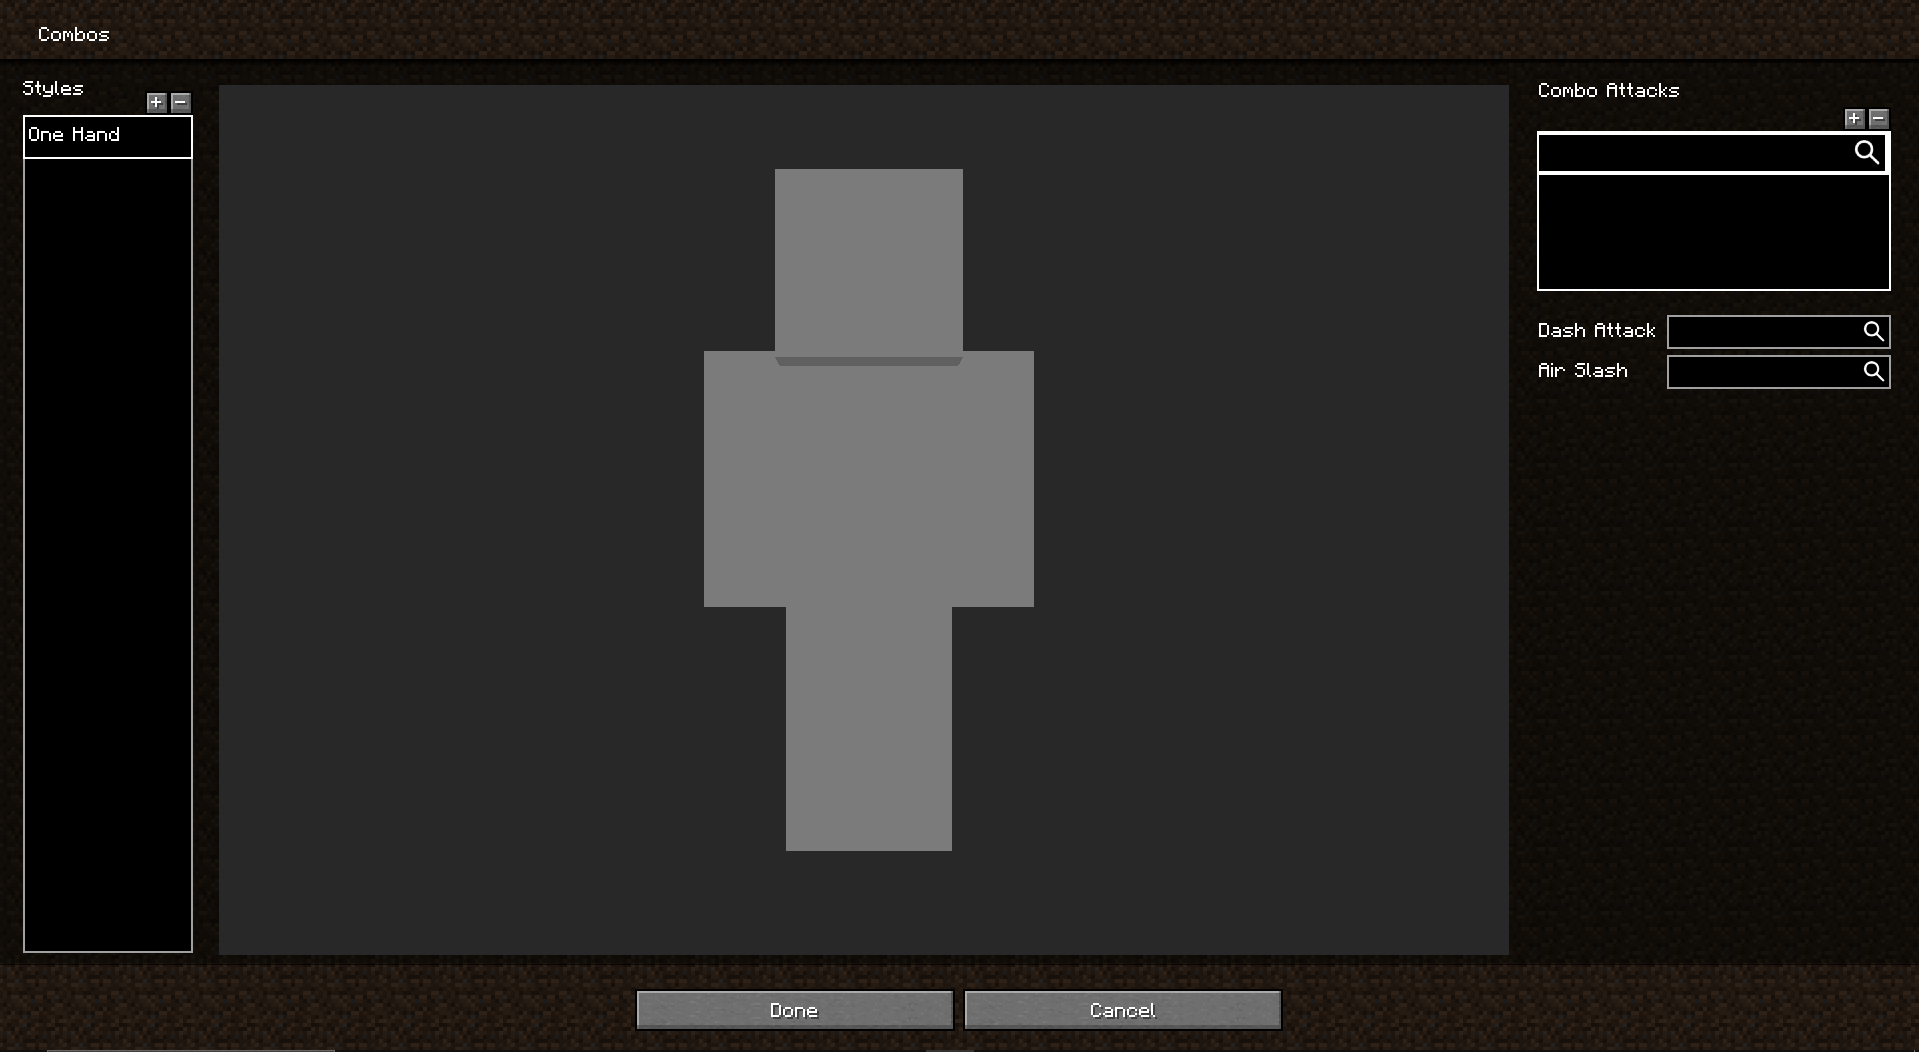
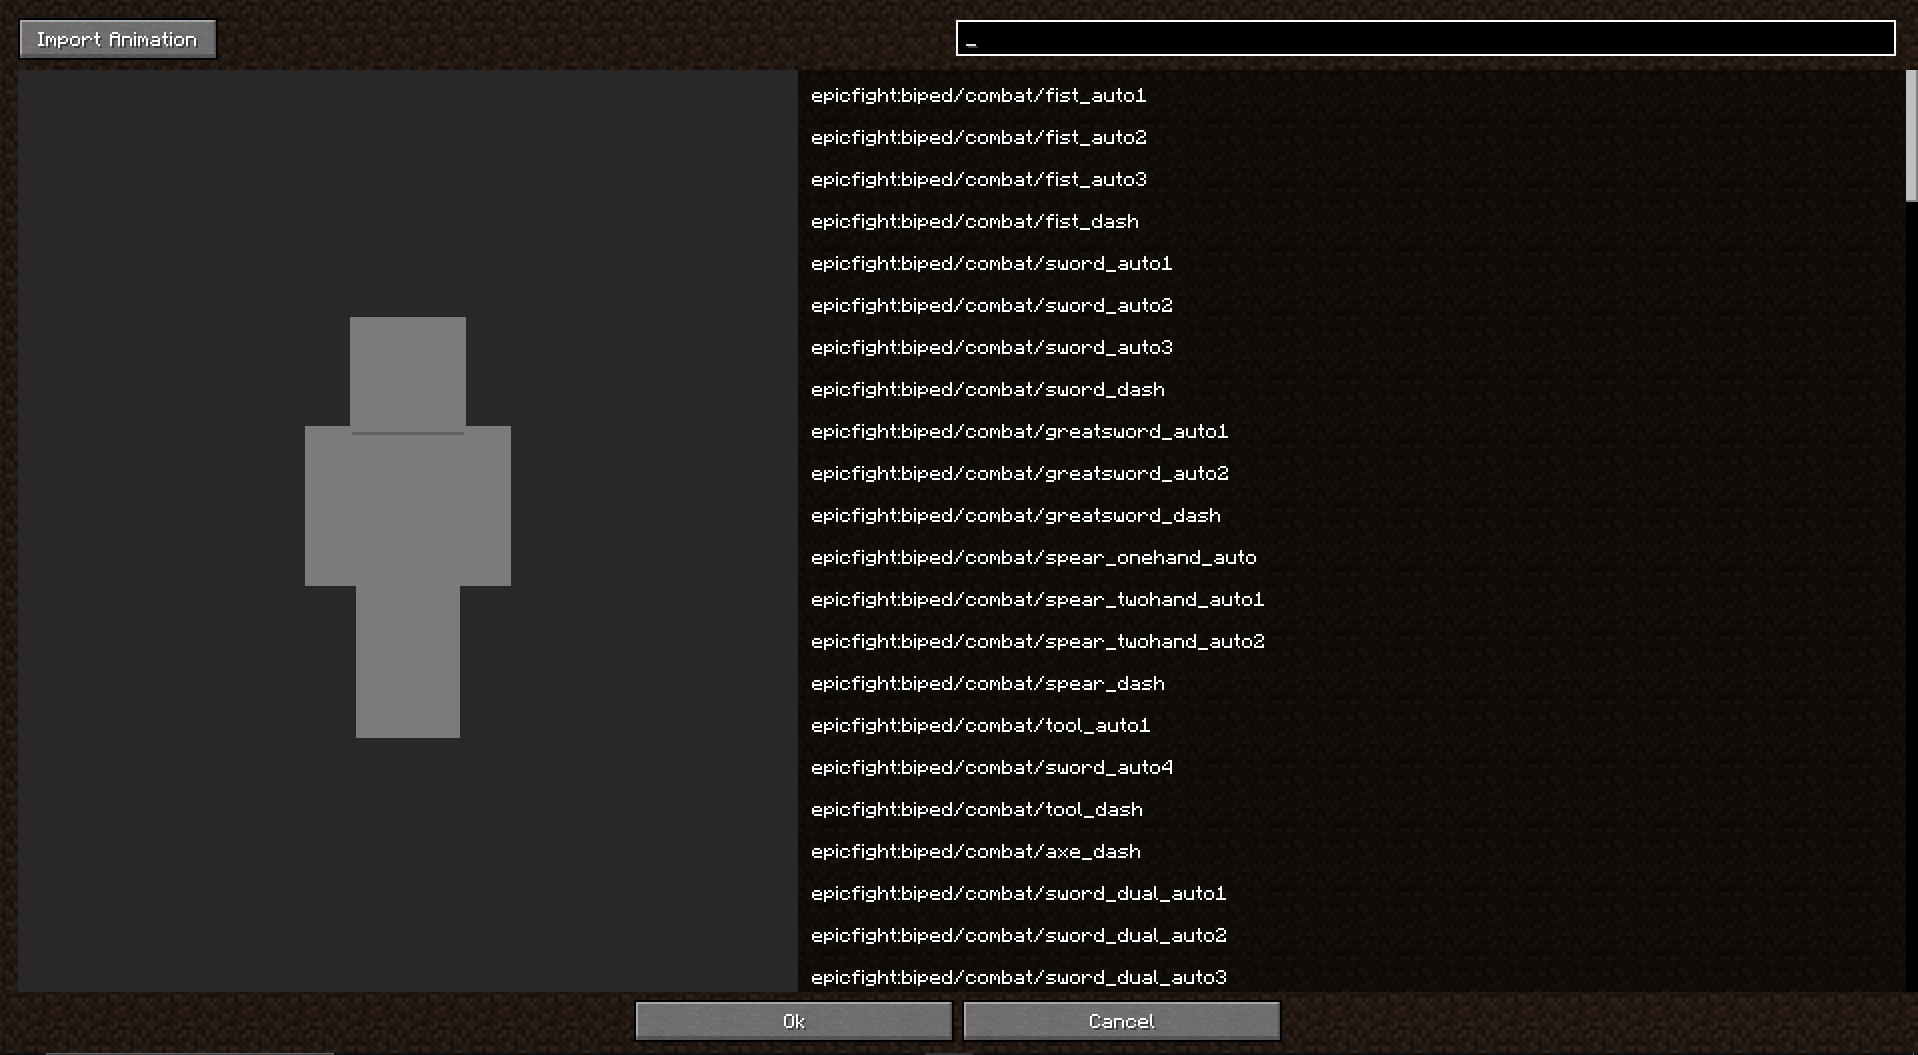
You should be left with the following screen:

Mind that the animation/model files to be imported should be exported from blender utilizing our custom exporter. See more about blender & how to start utilizing it with epic fight Here
Preview, Animations and Armatures
Imported models will appear in the preview screen. If your model file includes armature data, it’s automatically added to the Armatures grid.
Models with the same hierarchy in [Blender] can share an armature. You don’t need to re-import an armature if it already exists. (Example: Player and Vindicator models in wireframe mode)
Configure Animation Settings
-
Select an animation type:
- Static Animations: Used for basic living motions.
- Movement Animations: Adjust playback speed based on player movement.
- Attack Animations: Includes strike phases to deal damage.
(Define properties like transition time, repeat, and priority.) -
Layering System
- Understand that Epic Fight has four animation layers: Base and three Composite layers (lowest, middle, highest priority).
- Composite layers can include joint masks to apply animations selectively. (Example: Greatsword animations in Idle vs. Running states)
Attack Animations
- Defining Phases
- Anticipation: Players can track targets.
- Pre-delay: Movement is locked.
- Contact: Colliders strike entities.
- Recovery: Allows actions like dodging or skills.
- End: Returns to living animations. - Collider Settings
- Set colliders for animations or use default item capabilities.
- A red box appears in the preview to indicate collision points.
Additional Animation Type information
- Basic Attack Animations: For weapon combo sequences.
- hort and Long Hit Animations: Handle stun effects with variable durations.
- Knockdown Animations: For knockdown stuns, with dodge skills reducing stun time.