3D armor & Texture rendering issues
Most of the custom armors are broken in Epic Fight. This is because Epic Fight uses its own model, not only for entities but also for armors. Luckily, Epic Fight has a model generation algorithm based on the custom armors but sometimes it changes them in a bad way. This is the guide for mod pack makers to make custom armor visually flawless without having to tweak our source code. Here are the steps in which you can follow to achieve a patched armor:
Required tools:
💡 Remaking armors in Blockbench (Optional)
You don't need to remake the armor in blockbench as long as you have the official armor files for the mod you want to patch.
After downloading and installing all three softwares, the first thing you'll want to do is, pick a mod that has an armor set you want to patch, and from there try to recreate the model as accurately as possible. One efficient way you can do this, is usually by looking at the armor in-game and getting the textures from the source code of your desired mod.
EXAMPLE:

Above is the texture file for the archers_armor of the Dungeon Gear Mod. Lets take a look how we can re-create this armor only with Blockbench
1. Create a Generic Model so we can export it to blender later on. Preferably name the model something you can recognize, for example, Archer's Armor.

3. From there, you'll want to import all vanilla armor models. (You can import the vanilla armor models under Tools/Load CEM Template/Unsupported Entities).


6. After organizing the textures, press "ctrl + A", and make sure all textures are being used. If you miss any textures, that means you model needs more adjustments and so you'll need to add in extra pieces to the armor. In our case, the Archer's Armor has an extra part to its hat so we'll need to add in a cube and try to guess its rotation, scale and position based on the in-game armor added by Dungeon's gear and the texture size.


💡 Weight Paint and Vertex Correction
Go to Blender Basics and Tips and Tricks for Tips, Tricks and Fixes in how to use Blender
- First, open blender, go to file/import/Wavefront (.obj), and import your armor file you've just created in blockbench.
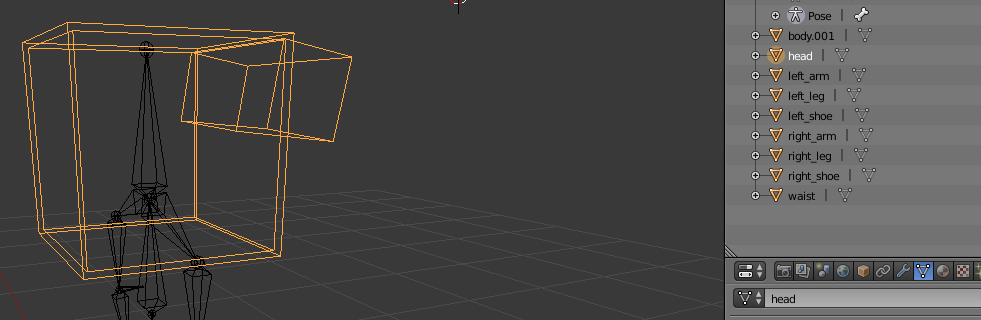
- After this, select one armor part to patch. We will patch the head layer first. So we'll select every cube and part that composes the helmet for the archer's armor. For us, the "head" and "headback.001" are the parts that make up for the helmet so we'll select both and press "ctrl + j" to join all of the parts into one single model (TIP: To join all parts, you'll want to be in object mode).
Select
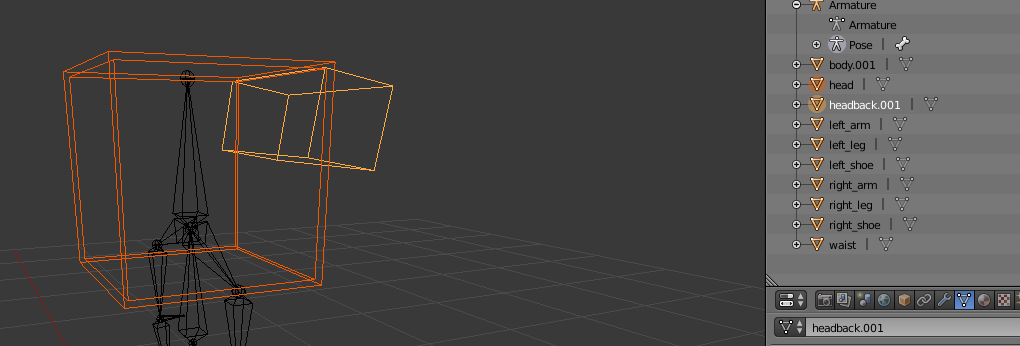
Join (Feel free to rename the new joined model the armor part it corresponds to, in our case i later renamed it "Helmet").
(In these screenshots all the other armor parts are hidden) - In object mode, correct the import rotation, and postion by clicking "alt + r" & "alt + g".
- On edit mode, rotate the model and correct its position to the original location before you reset the rot/pos on object mode.
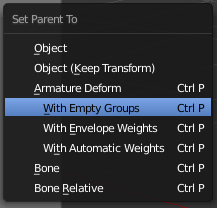
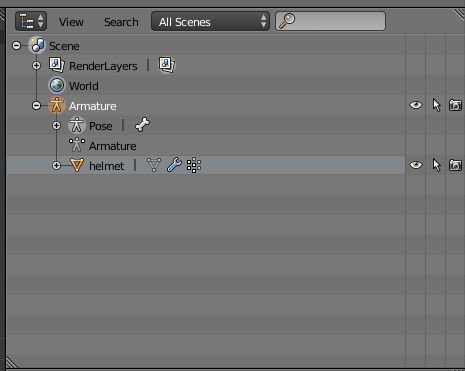
- Now after fixing the import rotation, we'll parent the model to the armature by going to object mode, selecting the helmet model and also the armature, going over to Object/Parent/Armature Deform/With Empty Groups/With Empty Groups. Now You've successfully parented the model to the armature, lets head over to weight paint. (TIP: You can select two things by pressing shift while right clicking them. Make sure both are selected in object mode and not pose or edit mode)

- By selecting the helmet model, and switching from object mode to weight paint, we'll finally apply the vertex group deformations so the helmet follows the head while our player plays any animation.

- To apply the weight paint, make sure you can see the vertices and you have wireframe mode enabled like in the following image:

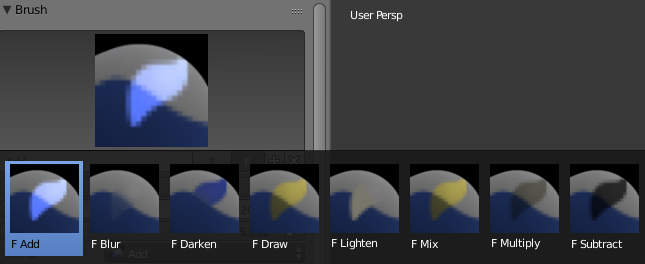
- Now you can choose from a range of brushes to apply the weight paint, but the ones we mainly use is subtract and add
- Select the desired vertex group on the right, the one we'll be working with is the head group as we are patching a helmet.
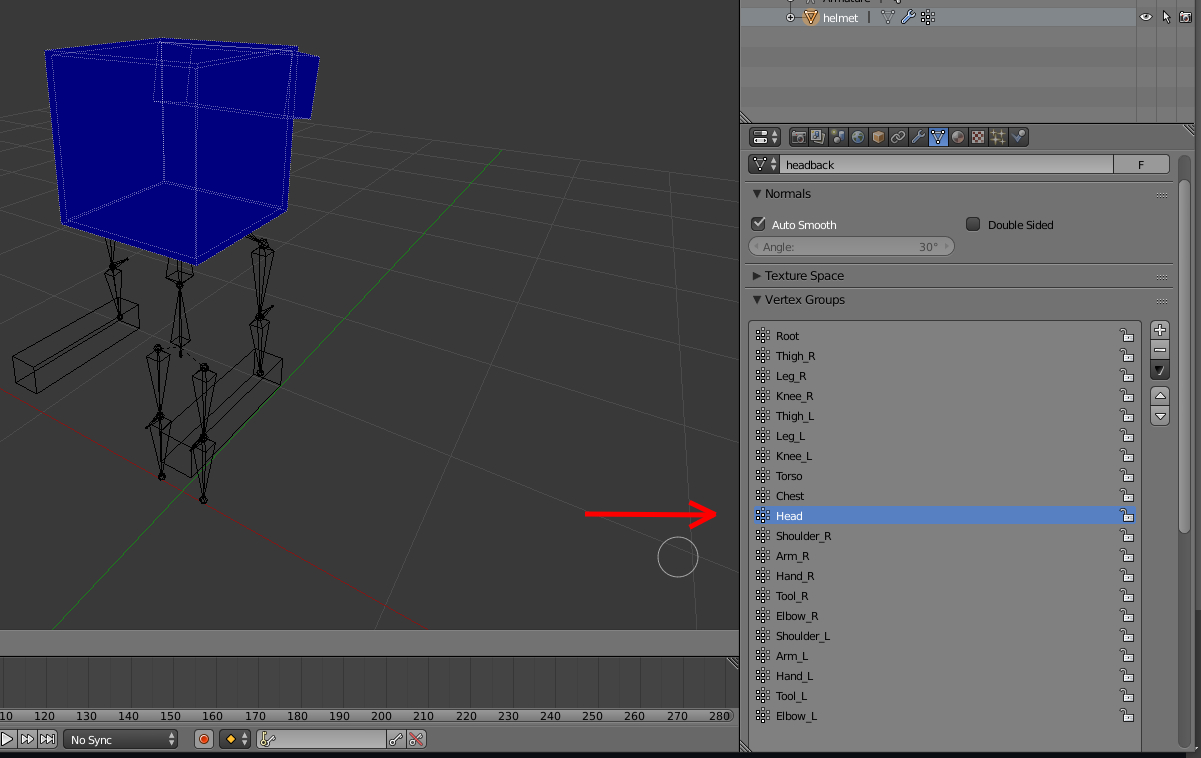
- Now simply go on your way painting the whole model so it follows the whole head. In the end you'll be able to get something like this:

- You can test to see if you've successfully parented and weight painted the helmet to the head by going over to your armature in pose mode and rotating the head bone around. If your model follows the head bone, then its correct, if not, then please go back a few steps and recheck to see if you've missed something.

💡 Exporting your patched models
Now that you've patched yourt models you'll want to export your work and apply the changes in game. But how can you do that? Well it's really simple.
- Make sure you don't have any armor parts or unwanted models on your project and only the desired armor part to be exported like so. (TIP: You can't export two armor parts at once, so export one at a time and delete all the other ones.)
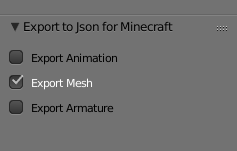
- After cleaning any unwanted models or armor parts that won't be exported, head over to File/Export/Animated Minecraft Model (.json)

- Make sure you only have Export Mesh selected as we're only exporting an armor and not an animation or custom armature.
- Check the export name to see if it matches the custom armor registry name in-game.

- Click Export to Json Minecraft after you are done.

- Now go to your game, select resourcepacks, and inside the resourcepacks folder, create a new folder. Inside it, you can create your pack.mcmeta like so:
Making the pack.mcmeta file
First, you'll need to create a pack.mcmeta by making a normal txt file and renaming it to pack.mcmeta (make sure filename extensions are turned on).
After that edit it and add these lines of code for your datapack to work.
pack_format Values
| Version | Value |
|---|---|
| 1.16.2–1.16.5 | 6 |
| 1.17.x | 7 |
| 1.18.2 | 8 |
| 1.19.2 | 9 |
| 1.20.1 | 15 |
Making the folder path
You'll need to make a series of folders with the following names. Every folder or file needs to be inside the last one.
assets -> "modid" -> animmodels -> armor -> "registryname".json (Drop your exported armor file here)
🎉 Congratulations, you've successfully patched your armor. 🎉
A few easier solutions for armor patching here: Other solutions for 3D armor glitches