Starting with Blender 3.6
Epic fight uses custom animations for multiple actions in game, from drinking, eating to even attack combos. These animations are handled by [Blender], a 3D open source software for modeling, animating, texturing, composition, rendering and video editing.
It may seem overwhelming to work with blender, but here I'll only be teaching you the absolute necessary to work with epic fight.
Installing blender
To install [Blender] (3.6) head to the following website:
Make sure to select the correct version that corresponds to your Operational System. (Here we'll be using Win 64x bits)
Extracting and Running ...
After downloading the correct file from the [Blender] index, you can extract the files using your preferred program.
After extracting the files, verify that [Blender] runs correctly. To test this, open the folder hierarchy and launch Blender.exe. If a window appears, [Blender] has been successfully installed.
Json exporter
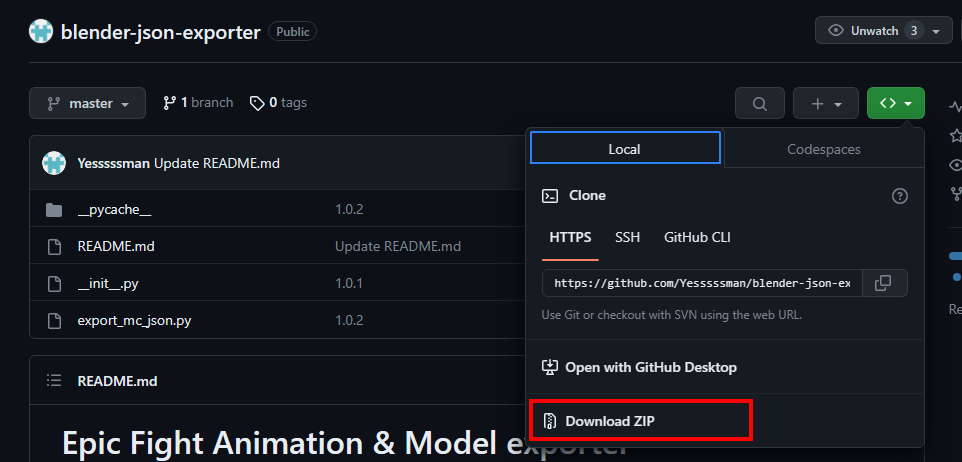
To install the custom Blender Exporter, visit the repository and download the master branch by following these steps:
- Go to the folder where blender is installed, move all files under /3.6/scripts/addons/xxxxxxxx/.(You should create a new folder, represented here by the multiple Xs, it's naming does not matter)
- Go to Blender File User Preferences Add-ons, And find an add-on named "Import-Export: Minecraft Model Json Exporter"
- Check the checkbox and Click "Save User Settings".
- As you can see when you click to export, you'll be able to generate a json file, in which you can choose to select 3 options, Mesh, Animations and Armature, but we'll see those later.

This page is still being worked on, help us contributing to it on our discord