Blockbench Armor Model Remake
No need to recreate armor in Blockbench if you already possess the armor files for the mod you aim to fix.
This guide is only meant for those who want to patch armors from other mods, and don't necessarily have the armor models for it. If you are a mod developer and you already have all the armor files in blockbench, you can just export them as OBJs and follow the tutorial on blender.
Required tool:
- BlockBench (Optional)
After downloading and installing all three softwares, the first thing you'll want to do is, pick a mod that has an armor set you want to patch, and from there try to recreate the model as accurately as possible. One efficient way you can do this, is usually by looking at the armor in-game and getting the textures from the source code of your desired mod.
EXAMPLE:

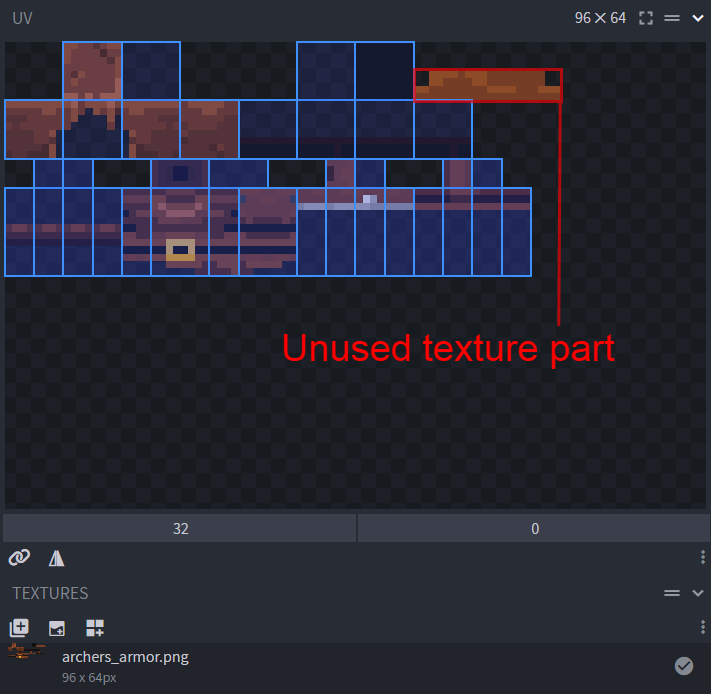
Above is the texture file for the archers_armor of the Dungeon Gear Mod. Lets take a look how we can re-create this armor by looking at the texture within Blockbench
Inside of Blockbench
-
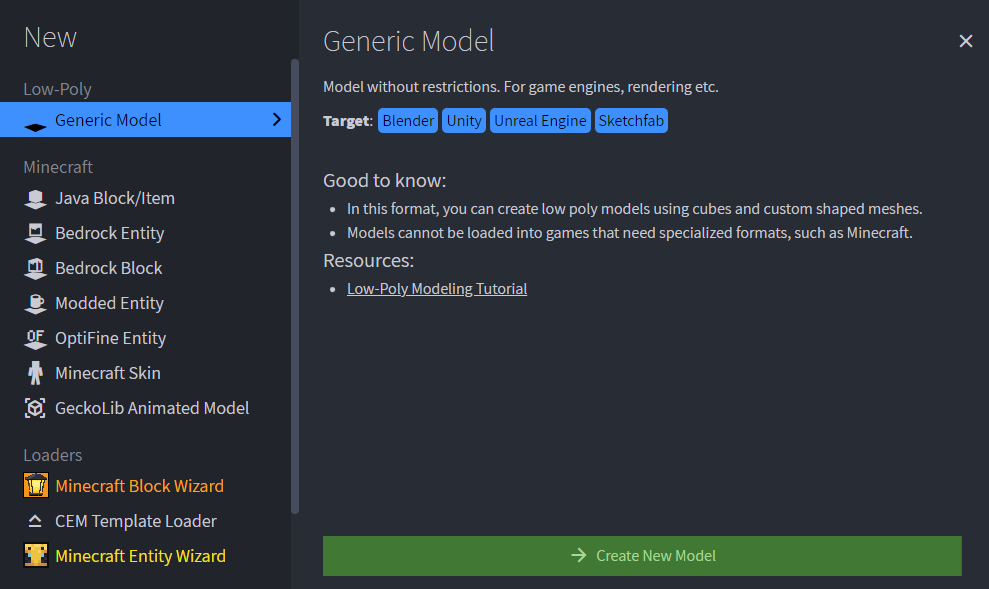
Create a Generic Model so we can export it to blender later on. Preferably name the model something you can recognize, for example, Archer's Armor.
Tip
Ensure that you have the CEM Template Loader plugin properly installed in order to seamlessly import the vanilla models.
You can download plugins under the
File/Pluginsoption.
-
From there, you'll want to import all vanilla armor models. You can import the vanilla armor models under:
Tools Load CEM Template Unsupported Entities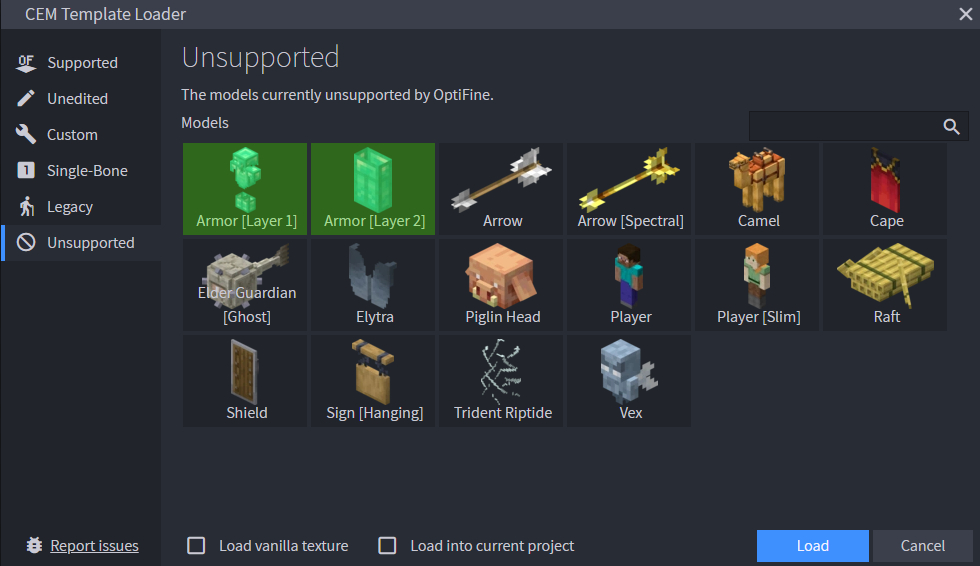
- Import the texture files into Blockbench, then update the project’s texture resolution so it exactly matches the dimensions of the imported texture. This ensures that every pixel lines up correctly on the model and prevents stretching, misalignment, or incorrect UV mapping while you work on the armor.
Tip
You can apply the textures on the model by dragging and dropping it on each armor part group
-
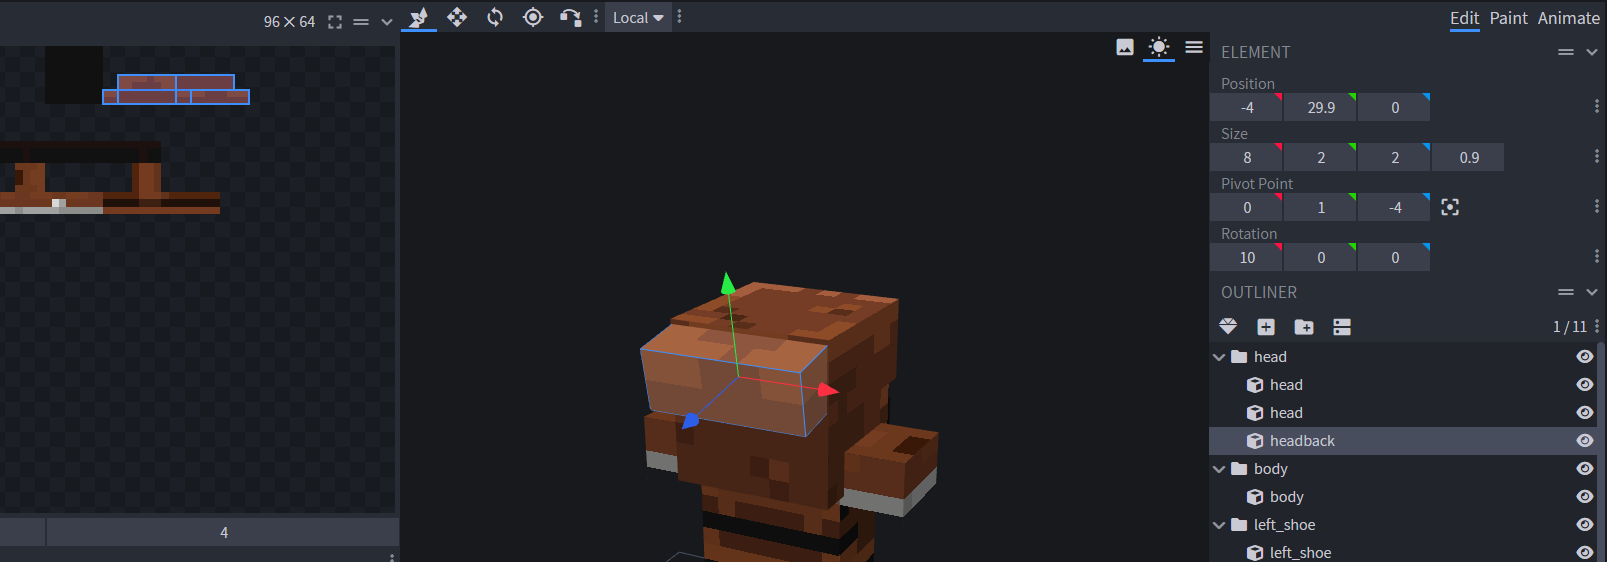
Now, let's fix the textures until they are in the correct order and look like the original model.After organizing the textures, press Ctrl + A, and make sure all textures are being used. If you miss any textures, that means you model needs more adjustments and so you'll need to add in extra pieces to the armor.
Note
In our case, the Archer's Armor has an extra part to its hat so we'll need to add in a cube and try to guess its rotation, scale and position based on the in-game armor added by Dungeon's gear and the texture size.
-
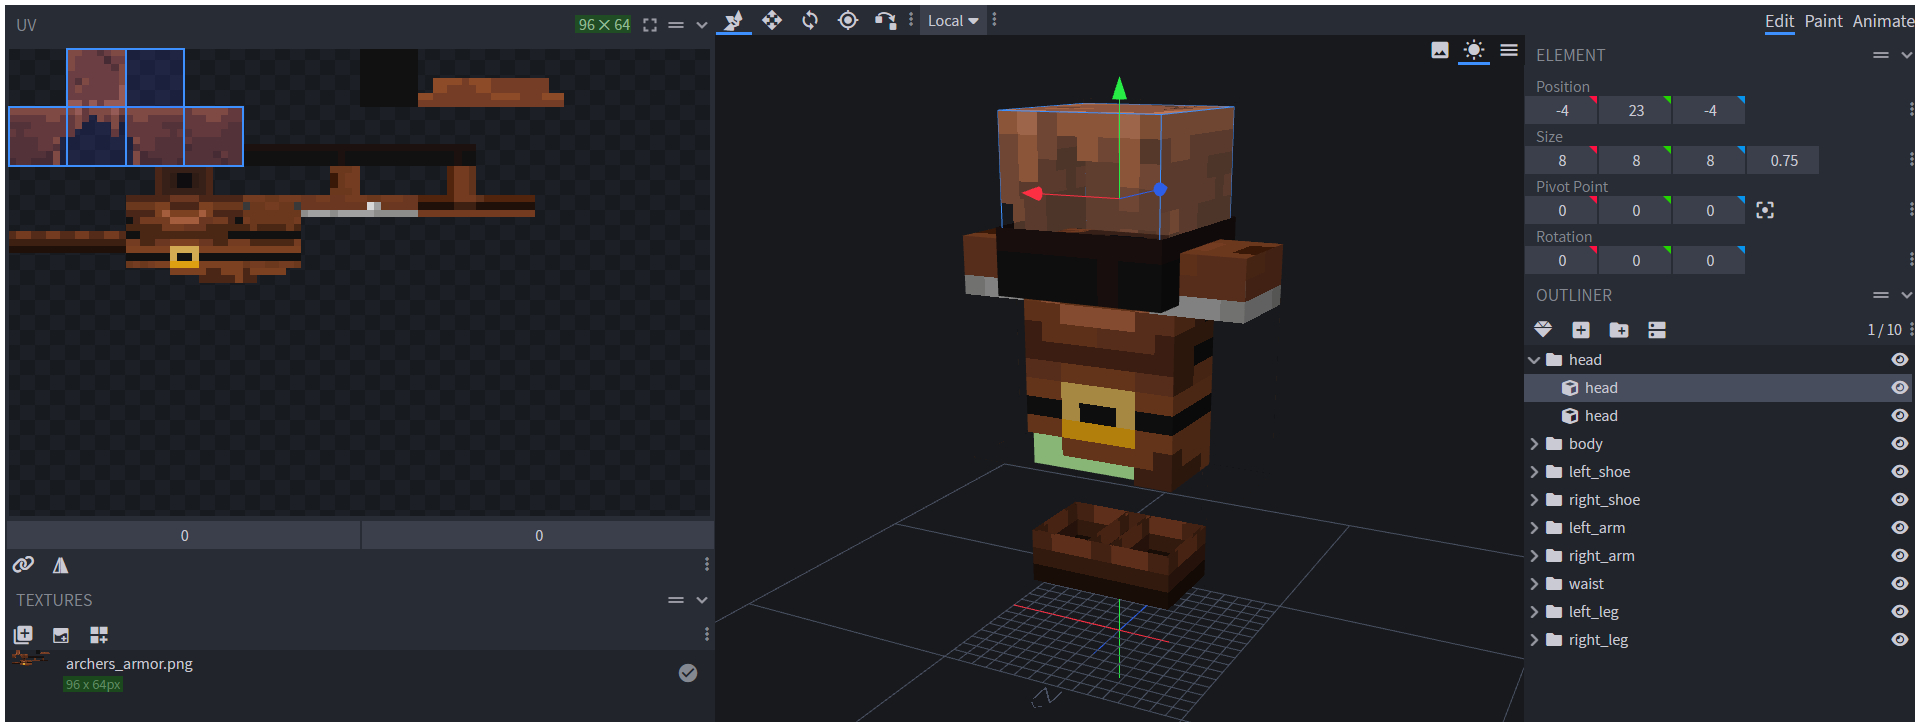
After making several adjustments, the model now closely matches the original armor’s appearance. With the shapes, proportions, and textures properly aligned, the model is complete and ready to be exported to [Blender], here we will begin patching and refining each individual armor component.
Note
Now when exporting you armor file, be sure to export it as a .obj, because that's what we'll be using inside blender.