3D Armor Fix [Blender 2.79]
In Epic Fight, many custom armors are dysfunctional due to the game's unique model system, which differs from both standard entities and armor. However, the mod provides a model generation algorithm based on custom armors, though it occasionally alters them unfavorably.
This guide extensively utilizes [Blender], so refer to Blender Basics and Tips and Tricks for comprehensive insights on using [Blender] effectively, including tips, tricks, and troubleshooting.
To replicate in-game armor models accurately, check Remaking armor models in Blockbench if your models aren't ready for [Blender] patching.
For mod pack creators and developers aiming for visually flawless custom armor without altering the source code, this step-by-step process facilitates the creation of properly patched armor compatible with Epic Fight:
Required tools:
Weight Paint and Vertex Correction
- First, open blender, go to file import Wavefront (
.obj), and import your armor file you've just created in blockbench.
- After this, select one armor part to patch. We will patch the head layer first. So we'll select every cube and part that composes the helmet for the archer's armor. For us, the "head" and "headback.001" are the parts that make up for the helmet so we'll select both and press Ctrl + J to join all of the parts into one single model.
Info
Before joining the different parts of the model, ensure that [Blender] is set to [Object Mode].
Select:
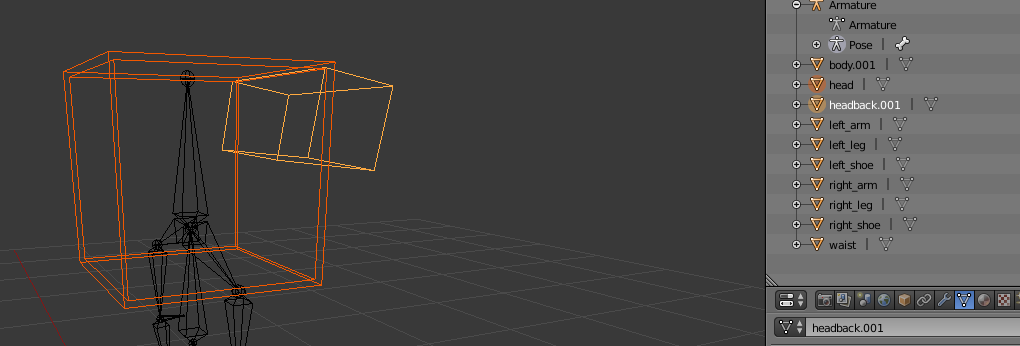
Join: (Feel free to rename the new joined model the armor part it corresponds to, in our case i later renamed it "Helmet").
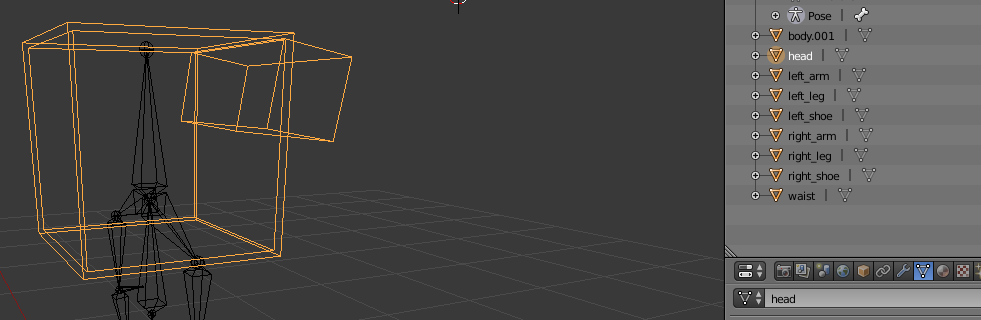
In these screenshots all the other armor parts are hidden.
- In object mode, correct the import rotation, and postion by clicking Alt + R & Alt + G.
On edit mode, rotate the model and correct its position to the original location before you reset the rot/pos on object mode.
-
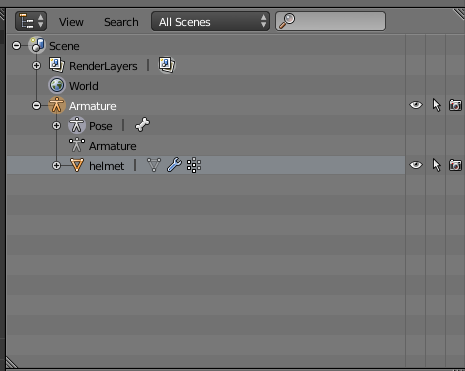
Now after fixing the import rotation, we'll parent the model to the armature by going to object mode, selecting the helmet model and also the armature, going over to:
Object Parent Armature Deform With Empty Groups With Empty Groups.
Tip
![]()
-
By selecting the helmet model, and switching from object mode to weight paint, we'll finally apply the vertex group deformations so the helmet follows the head while our player plays any animation.
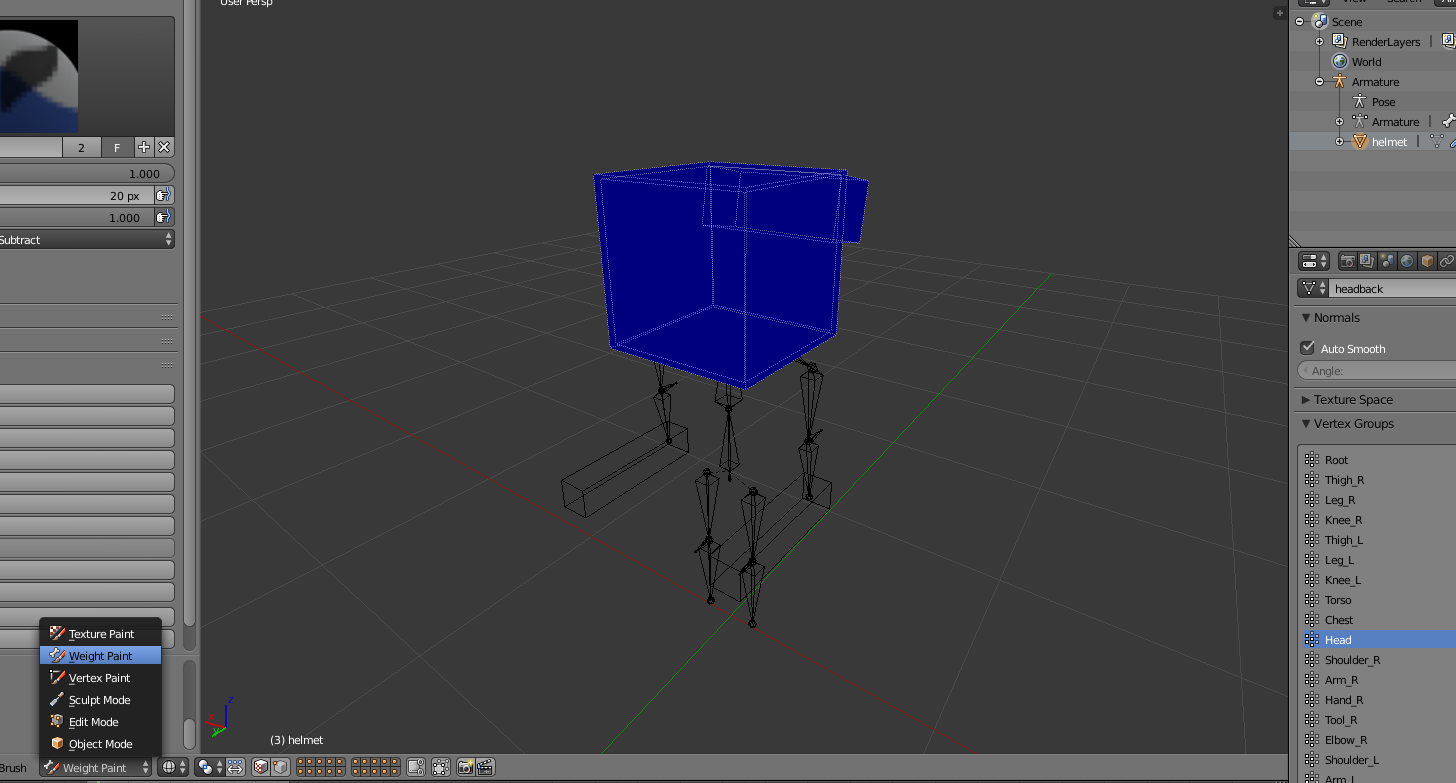
-
Before applying weight paint, ensure that the model’s vertices are visible by enabling Wireframe mode, as shown in the image below. This makes it easier to see how the weights are distributed across the mesh and helps you paint more accurately.

-
You now have access to multiple weight painting brushes, but for this workflow, you will mainly be using the Add and Subtract brushes.
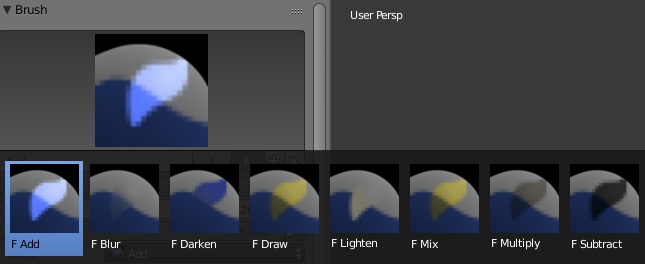
Info
The Add brush increases a vertex’s influence by assigning more weight to the currently selected bone, causing the affected area of the mesh to move along with that bone during animation.
The Subtract brush does the opposite: it lowers or removes the bone’s influence from selected vertices, helping eliminate stretching, clipping, or deformation in parts of the mesh that should remain rigid or be controlled by another bone.
-
Select the desired vertex group on the right, the one we'll be working with is the head group as we are patching a helmet.
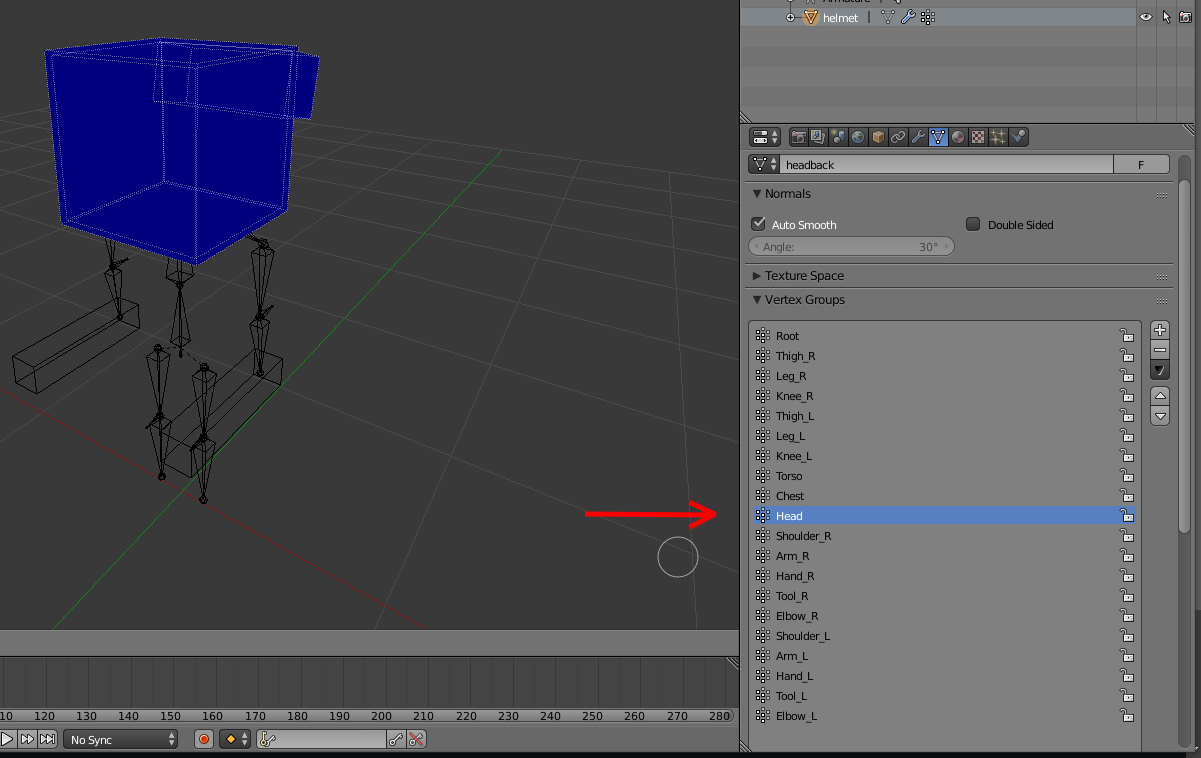
-
Now continue weight painting the entire model so that all relevant vertices are influenced by the head bone. As you paint, make sure that every part of the mesh that should move with the head is fully covered. By the end of this process, your model should appear uniformly red when the correct bone is selected, indicating that all vertices have a weight value of
1.0and are fully influenced by the head bone.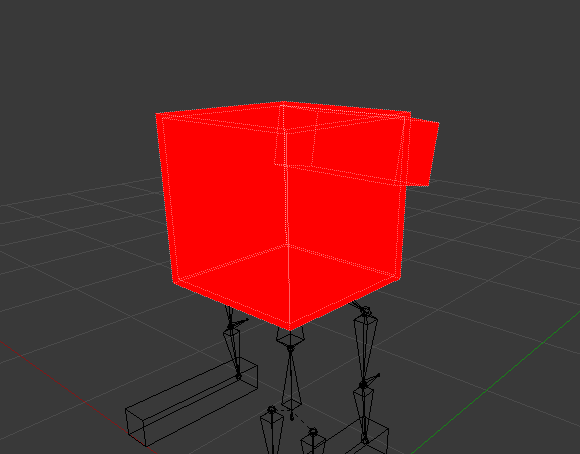
Tip
When the mesh is fully painted, the entire model should move together with the head during animation. This confirms that the weight painting has been applied correctly and that no sections of the mesh are being left unassigned.
If you notice that certain parts of the model lag behind, remain stationary, or deform incorrectly when the head moves, this indicates that some vertices are missing weight paint.
In such cases, switch back to Weight Paint mode, identify the uncolored or partially colored areas, and use the Add brush to apply the missing weights until those sections respond properly to the bone’s movement.
Taking the time to ensure complete and consistent coverage is important, as even a small group of unpainted vertices can cause visual artifacts such as floating geometry, clipping, or unnatural movement during animations.
-
You can test to see if you've successfully parented and weight painted the helmet to the head by going over to your armature in pose mode and rotating the head bone around. If your model follows the head bone, then its correct, if not, then please go back a few steps and recheck to see if you've missed something.
Exporting your patched models
Now that you have successfully finished patching your models, the next step is to export your work and apply those changes in-game so you can see the results in action. At this point, all of the structural adjustments, weight painting, and cleanup work should already be complete, meaning the models are ready to be finalized.
Although this may sound like a complex step, the process is actually quite simple once you know where the files need to go and how they are loaded by the game. By exporting the patched models correctly and placing them in the appropriate location, you can quickly test your changes, verify that everything behaves as expected, and make any final tweaks if necessary.
The following steps will walk you through exporting the patched models and applying them in-game, allowing you to confirm that the armor moves correctly, appears as intended, and integrates seamlessly with the rest of the mod.
-
Make sure you don't have any armor parts or unwanted models on your project and only the desired armor part to be exported like so.
Tip
Armor parts must be exported one at a time, as exporting multiple pieces simultaneously is not supported and can result in incorrect files. Use the Checklist below before exporting:
Check Description Armor part only Only the target armor part is present No unused objects Remove temporary, duplicate, or unused meshes. Deformation The mesh follows the correct bone in Pose Mode. -
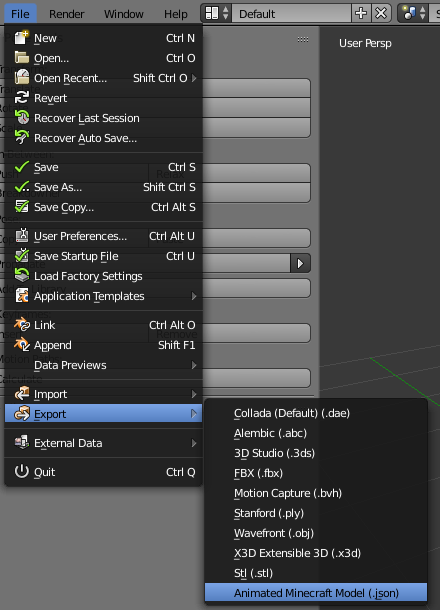
Once the scene is clean, navigate to File Export Animated Minecraft Model (.json). This will open the export dialog and generate the JSON file required for use in the next stage of the process, ensuring that the armor part is exported correctly and in the proper format.
-
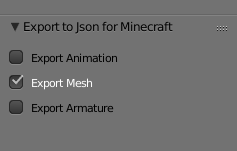
In the export settings, ensure that only the Export Mesh option is enabled. Since you are exporting an armor piece, there is no need to include animations or a custom armature, and enabling them may result in unnecessary or incorrect data in the exported file.
-
Make sure the export name exactly matches the custom armor’s registry name as defined in-game. Using mismatched names can prevent the armor from being properly detected or may cause it to reference the wrong asset.

-
Click Export to Json Minecraft after you are done.

Making the pack.mcmeta file
First, you'll need to create a pack.mcmeta file. Here's how to do it:
-
Create the File:
- Start by creating a new text file.
- Rename the file topack.mcmeta. Ensure that file extensions are visible so you can properly change the extension (e.g., from.txtto.mcmeta). -
Edit the File:
- Open the file with a text editor and add the following code for your datapack to function properly:
pack_format Values
| Version | Value |
|---|---|
| 1.16.5 | 6 |
| 1.17.x | 7 |
| 1.18.2 | 8 |
| 1.19.2 | 9 |
| 1.20.1 | 15 |
| 1.21.1 | 48 |
Making the folder path
To set up the folder structure, follow these steps. Each folder or file must be nested inside the previous one as per the hierarchy shown below:
assets "modid" animmodels "registryname".json -
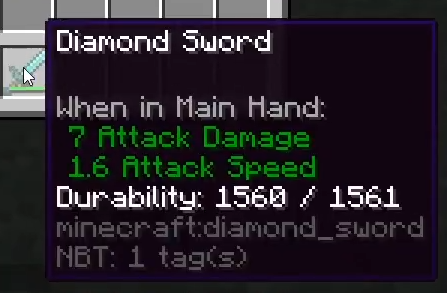
modid: The mod ID is usually the name of the mod. You can often find it by checking in-game item tooltips (pressF3 + Hto enable Advanced Tooltips) or by looking at commands or messages related to the mod.
For example, if the tooltip for an item showsmodid:itemname, the part before the colon(modid)is what you’ll use to name the"modid"folder.
-
registryname: To locate an item’s registry name, pressF3 + Hin-game to enable Advanced Tooltips. Then, hover over the item to view its registry name.
Tip
When you create the registryname.json file under the referenced file directory, make sure the file extension is changed from .txt to .json
Other solutions for 3D armor glitches